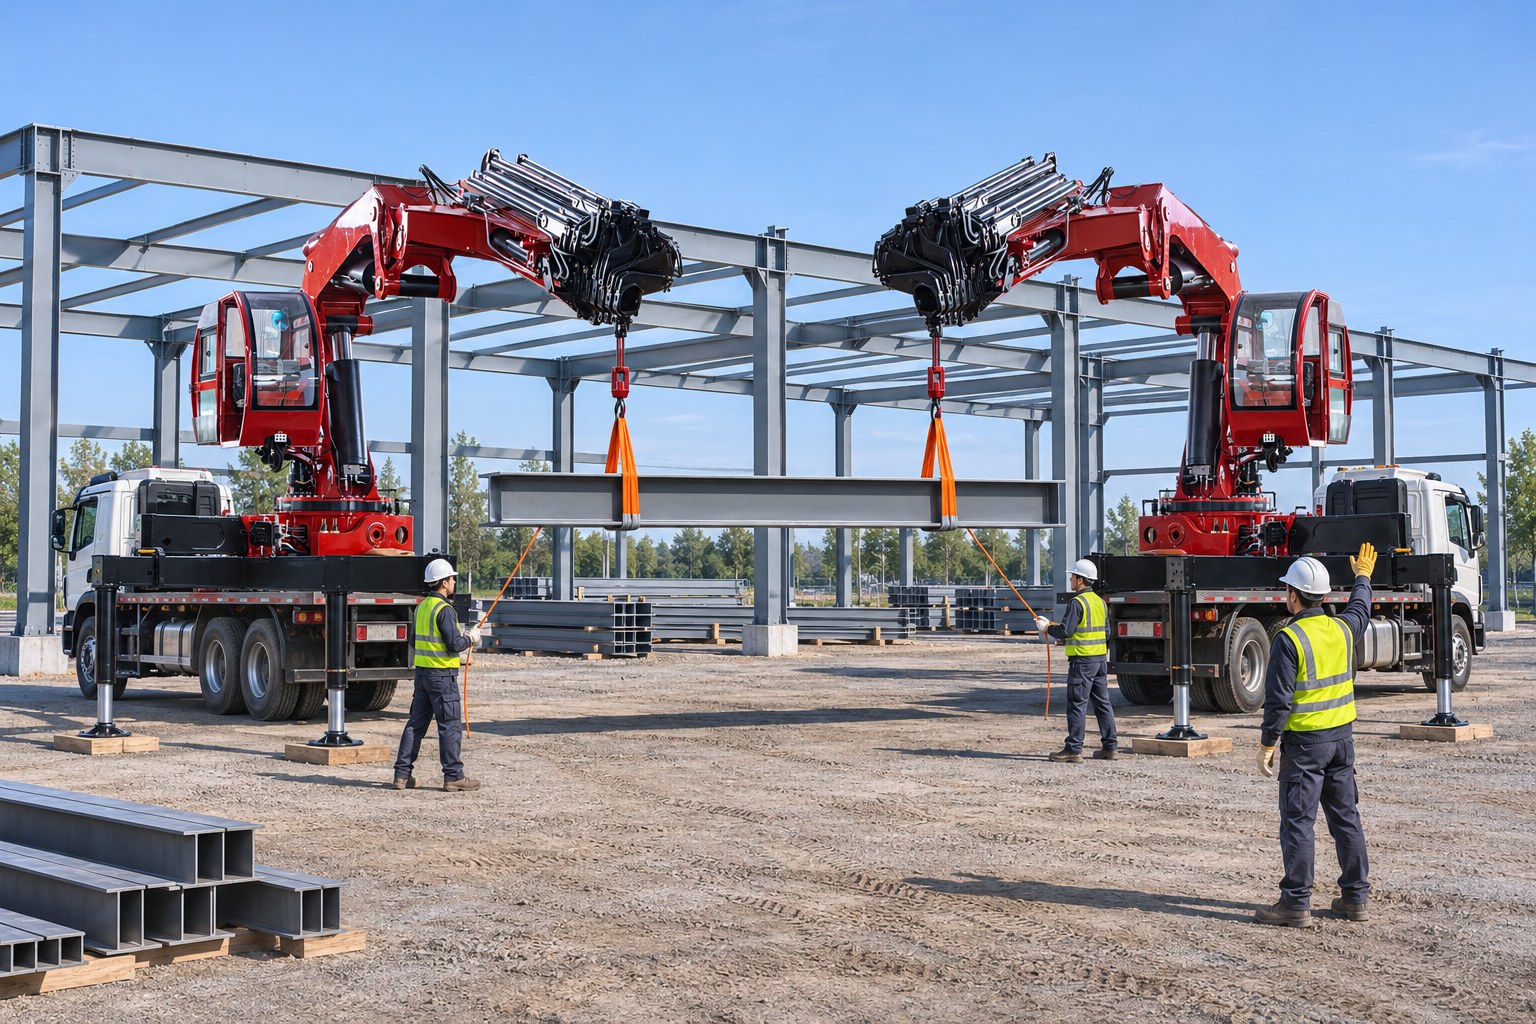

A spreader bar is a rigid bar hung below a crane hook on two angled top slings, with the load hanging from its ends on vertical slings, so the bar is squeezed in compression. A lifting beam hangs from the hook by a single point, with the load below it, so the beam carries the load in bending. Consequently, a spreader bar is usually the better choice when you have hook height to spare and want a lighter device, whereas a lifting beam is the better choice when headroom is limited, because it needs no slings above it.
BOB-LIFT has built truck mounted cranes in Xuzhou since 2003, and buyers often ask how much a spreader bar costs them in capacity and hook height. This guide compares the two devices and explains how to rig a spreader bar step by step. It then uses two real BOB-LIFT load charts, a knuckle boom and a telescopic crane, to show how the rigging takes hook height before it takes capacity. We make the cranes only, so spreader bars, lifting beams, slings and shackles are supplied separately.
Key takeaways
- A spreader bar works in compression and needs slings above it; a lifting beam works in bending and hangs from one point, so it needs less headroom but is heavier for the same load.
- With the top slings at the 90° maximum included angle that NSW rigging guidance gives, the slings above a spreader bar rise at least half the bar’s length, which means 3 m for a bar 6 m long.
- Everything below the hook counts as load: OSHA’s definition includes “the load-attaching equipment”, so add the bar, slings and shackles before you read the load chart.
- In our example, an SQ8ZA4 knuckle boom crane carries the load at a 6,400 mm radius but runs out of hook height with a spreader bar, while a lifting beam or the taller SQ8SA4 telescopic crane does the job.
- Use the device only within its marked working load limit, inspect it before each shift and make a short trial lift to check the balance.
What is the difference between a spreader bar and a lifting beam?
The difference lies in how each device carries the load. NSW Government’s dogging and rigging guide puts it plainly: “spreader beams work in compression”, while “lifting beams are subject to a bending moment at the centre of the beam” and are “normally connected directly to the crane hook” [1]. In practice, the terms spreader bar, spreader beam and spreader describe the same compression device in most yards, while lifting beam refers specifically to the bending type.
That single structural difference determines almost everything else. Purdue University’s crane training notes say spreader bars “have the advantage of being lighter and less expensive” because “the forces on the bar are compressive instead of bending” [2]. The drawback is the rigging above the bar, “which limits the height that they can be lifted before reaching the maximum lifting height of the crane”. A lifting beam has “no rigging above the beam”, which matters “when working near the lifting height limit of the crane”, but because the forces bend it, the beam “must be larger and heavier”.
Both are below-the-hook lifting devices, so the same standards apply to them as to clamps, magnets and forks. Our guide to below-the-hook lifting devices covers ASME B30.20 for use and inspection and ASME BTH-1 for design, along with the OSHA and LOLER rules. This page focuses on choosing between the two beams and rigging them under a truck mounted crane.
Spreader bar vs lifting beam at a glance
The table sums up the practical differences. NSW also lists that “spreader beams have a higher capacity approximately 5:1”. It illustrates this with a combination beam rated 15 tonnes as a spreader beam but only between 2,000 and 3,200 kg as a lifting beam, depending on its length [1].
| Feature | Spreader bar (spreader beam) | Lifting beam |
|---|---|---|
| How the beam is loaded | Compression along the bar | Bending, highest at the centre |
| Connection to the hook | Two top slings, or a bridle, to the bar ends | One bail or lug straight onto the hook |
| Headroom needed | More: the top slings rise above the bar | Less: no slings above the beam |
| Self weight for the same load | Lower | Higher |
| Rating of the same steel section | Higher (about 5:1 in the NSW example) | Lower, and it falls as the span grows |
| Extra rigging to buy and inspect | Top slings rated for the bar load and their angle | Usually one shackle |
| Typical use | Long or flexible loads, boats, trusses, machinery where height is available | Low headroom, near the crane’s maximum hook height, short spans |
| Adjustable versions | Common: pinned extensions or several lug holes | Common: several pick points along the beam |

Why does the sling angle above a spreader bar matter?
The top slings carry more than the load, and the flatter they are, the more they carry. NSW says a spreader beam’s “max sling angle is 90 degrees”, which is the included angle between the two top legs [1]. At that angle, simple geometry shows that each top leg carries roughly seven tenths of the total load, and the bar is compressed by a force equal to half the total load. At a 60° included angle, by contrast, each leg carries just under six tenths of the load, although the slings then rise almost the full length of the bar.
This explains why Purdue’s notes say “the rigging above the bar must be rated for the rating of the bar including allowance for the angle of the rigging above the bar” [2]. The angle factor tables, hitches and leg tension calculation are covered in our crane rigging and slings guide. Importantly, the bottom slings should hang close to vertical, because keeping them vertical is the whole purpose of the bar.
Adjustable, fixed and 4-point spreader bars
Spreader bars come in several common configurations, and the right one depends on how often your load length changes and how many pick points it has.
- Fixed bar: one length and one pair of lugs, the simplest and lightest option for an identical load you lift repeatedly.
- Adjustable spreader bar: a centre tube with pinned extension pieces or a row of lug holes. NSW notes that beams “can be extended by removing pins (equal extension on both ends)”. It adds that the sling “needs to be long enough for the beam to be fully open and still have an angle less than 90 degrees” [1]. The rating usually changes with the length, so check the marking for the length you set.
- 4-point spreader bar or H-frame: two bars or a frame with four lift points, for loads such as panels, frames or containers. NSW warns that two, three and four leg slings “only ever rely on the capacity of 2 legs”, because you can never guarantee the load is shared equally [4].
- Combination beam: one beam that can be rigged either way. Its rating as a lifting beam is much lower than as a spreader beam, as the NSW table shows.
For specific loads, our sister guides show the device in use. The truss crane guide covers the spreader bar on long roof trusses, while how to lift a shipping container with a crane explains the spreader frame and the bottom-lift beam rules.
How do you use a spreader bar, step by step?
Rigging a spreader bar follows the same sequence every time: weight, device, slings, balance, then the lift. These steps assume a qualified rigger and a crane set up on firm ground with its outriggers out.
- Find the load weight: Under paragraph (o)(3)(i) of the OSHA crane operations rule, the weight must come “from a source recognized by the industry (such as the load’s manufacturer)”, a recognised calculation or “other equally reliable means”.
- Check the marking: Paragraph (a)(2) of OSHA’s rigging equipment rule says rigging equipment must have “permanently affixed and legible identification markings” showing the safe working load, and must not be used without them. In Great Britain, LOLER regulation 7 requires accessories to be “clearly marked to indicate their safe working loads”.
- Inspect before use: under paragraph (a)(1) of the same rigging rule, equipment “shall be inspected prior to use on each shift”, and defective equipment “shall be removed from service”.
- Rig the top slings: Use slings rated for the bar load at their angle, keep the included angle within the bar maker’s limit, and close every hook latch.
- Rig the bottom slings: Attach them at the load’s lifting points so they hang close to vertical, and set the bar lugs or extensions so the bar is centred over the load.
- Put the hook over the centre of gravity: On an unbalanced load, shift the lug positions or adjust leg lengths. NSW’s rule for the first lift is: “stop, check for balance. If not balanced, put down, readjust or reposition slings then test again.” [3]
- Fit a tagline: A long load rotates easily. Paragraph (w) of the same crane operation rule says “a tag or restraint line must be used if necessary to prevent rotation of the load that would be hazardous”.
- Keep people out of the fall zone: Under paragraph (b) of OSHA’s fall zone rule, only workers hooking, unhooking or guiding the load, or making its initial attachment, may be inside it.
- Land and clear the gear: Lower the load gradually, unhook only when the load is stable, and remove rigging that is not in use from the immediate work area, as paragraph (a)(3) of the rigging rule requires.
Write the bar, slings and their total weight into your crane lift plan, together with the radius and the load chart figure you used.
How much hook height does the rigging take?
Start at the hook and add every component down to the underside of the load. For a spreader bar, the total is the height of the top slings, the bar and its shackles, the bottom slings and the depth of the load. For a lifting beam, the top slings are replaced by a short bail and shackle.
The top slings are usually the largest component. At the 90° included angle they rise half the length of the bar, and at 60° they rise nearly nine tenths of its length. On a bar 6 m long, they consequently consume 3,000 mm or approximately 5,200 mm of hook height before the bar itself begins. Therefore, compare the result with the crane’s range diagram at your working radius, not with its maximum height, because a crane’s hook height falls as the radius grows.
Example: checking capacity and hook height on two BOB-LIFT cranes
Example scenario (an illustration, not a customer record): a contractor must land an 8 m bundle of steel pipe on a flat roof. The roof edge is 7,000 mm above the ground, at a radius of up to 6,400 mm from the crane. The bundle must clear the edge by 500 mm, so its underside must reach 7,500 mm above the ground. All load, rigging and site figures below are ASSUMED, while the crane figures come from BOB-LIFT drawings.
- Load: a pipe bundle of 1,300 kg that is 400 mm deep (assumed).
- Spreader bar option: a 6 m bar weighing 150 kg plus 50 kg of slings and shackles, giving a gross load of 1,500 kg. Below the hook it needs 3,000 mm of top slings at a 90° included angle, 300 mm for the bar and shackles, 1,500 mm of bottom slings and 400 mm of load, 5,200 mm in total.
- Lifting beam option: a 6 m beam weighing 300 kg plus 30 kg of shackles and slings, giving a gross load of 1,630 kg. Below the hook it needs 400 mm for the bail and shackle, 400 mm of beam, 1,500 mm of slings and 400 mm of load, 2,700 mm in total.
- Hook height needed above the ground: 7,500 + 5,200 = 12,700 mm with the spreader bar, and 7,500 + 2,700 = 10,200 mm with the lifting beam.
- Crane base: 1,200 mm above the ground on the truck (assumed), because both range diagrams below measure height from the crane base.
We checked the job against two 8 tonne BOB-LIFT cranes: the SQ8ZA4 knuckle boom crane and the SQ8SA4 telescopic crane. The knuckle boom lifts on a hook at the boom tip. The telescopic crane lifts on its winch rope, so its hook block hangs further below the tip.
| Check | SQ8ZA4 knuckle boom | SQ8SA4 telescopic |
|---|---|---|
| Maximum capacity / lifting moment | 8,000 kg / 16.7 t·m | 8,000 kg / 20 t·m |
| Chart point used (at or beyond 6.4 m) | 2,470 kg at 6,445 mm | 1,800 kg at 7,000 mm (14,300 mm boom at 60°) |
| Boom tip above crane base at that radius (range diagram) | about 10,500 mm | about 14,000 mm |
| Hook height above ground (assumed 400 mm hook drop / 1,000 mm hook block) | about 11,300 mm | about 14,200 mm |
| Spreader bar: 1,500 kg, needs 12,700 mm | Load passes; hook height 1,400 mm short | Passes (1,550 kg with an assumed 50 kg hook block); 1,500 mm height spare |
| Lifting beam: 1,630 kg, needs 10,200 mm | Passes, 840 kg and 1,100 mm spare | Passes (1,680 kg), but only 120 kg spare |
The result is not what the headline capacity suggests. On the knuckle boom, for example, the spreader bar is well within the load chart, but the top slings consume the available hook height and the bundle cannot clear the roof edge. In contrast, a lifting beam solves that problem on the same crane, with 840 kg of capacity left over. The telescopic crane has enough hook height for the spreader bar, which is the better choice on that machine, because the heavier lifting beam leaves only 120 kg spare.

Two further details from the load charts are worth remembering. The SQ8ZA4 is rated 3,700 kg at 4,461 mm, 1,820 kg at 8,465 mm and 1,420 kg at its maximum radius of 10,515 mm, and it weighs 3,050 kg. The boom of the SQ8SA4 runs from 5,300 to 14,300 mm, and at 75° its tip reaches about 16 m above the crane base, with a rating of 2,800 kg at a radius of 3,200 mm. In other words, the telescopic crane suits high lifts close to the truck, while the knuckle boom suits reaching over obstacles and down into openings. Our knuckle boom vs telescopic boom comparison explains the differences in more detail.
Both cranes have full charts on their product pages: the SQ8ZA4 and the SQ8SA4. Our guide on how to read a crane load chart explains chart points, and the safe working load article explains why the rigging counts. OSHA’s crane definitions define the load as the object plus “the load-attaching equipment, such as, the load block, ropes, slings, shackles, and any other ancillary attachment”.
Every BOB-LIFT crane is listed with a load moment limiter, as our article on the lifting moment of a crane explains. However, a limiter reacts to load and radius, and it cannot tell you that the top slings will hit the roof edge. Our load moment indicator guide covers what the device can and cannot see.
How should you inspect a spreader bar or lifting beam?
Check the identification marking first, then the steel structure, then every connection. NSW lists the minimum markings on a beam as the “working load limit”, the “manufacturer’s mark” and the “serial number” [1]. It adds tare weight, use instructions, manufacture date and the working load limit at different extensions as other markings. The tare weight is the figure you need for the load chart.
- Marking: legible, and the rating covers the length you have set.
- Structure: no bends, twists, cracks, or damaged welds and lugs.
- Pins and holes: the correct pins, with keepers fitted and no worn or stretched holes.
- Slings and shackles: marked, inspected and rated for their angle, as our crane hook guide describes for the hook end.
- Out of service: remove anything defective and tag it until a competent person releases it.
Periodic inspections follow ASME B30.20 in the US and LOLER thorough examinations in Great Britain, both summarised in our below-the-hook devices guide. In addition, on US construction sites, special custom-design lifting accessories must be “proof-tested prior to use to 125 percent of their rated load” under paragraph (a)(4) of the rigging rule.
Which one should you choose?
Start with the available hook height at your working radius, then consider the weight. If the spreader bar’s stack of rigging fits under the hook with a margin, use it, because it is lighter and leaves more of the load chart for the load. If the hook height is short, use a lifting beam and check that its extra weight still fits the chart. If neither option fits, position the truck closer, shorten the rigging or choose a crane with more height at that radius.
Two situations, however, practically decide themselves. Loads that must not be squeezed, such as a boat hull or a forklift’s overhead guard, need vertical slings and therefore one of the two beams. For details, see how to lift a boat with a crane and how to lift a forklift with a crane. Compact loads with good lifting points, like the test weights in the photo above, need neither.
When those lifting points are welded lugs or pad eyes, check their rating and the direction of pull in our guide to lifting lugs and pad eyes.
Frequently asked questions
What is the difference between a spreader bar and a lifting beam?
A spreader bar hangs from two top slings and works in compression, while a lifting beam hangs from one point on the hook and works in bending. The spreader bar is lighter for the same load, but the lifting beam needs much less headroom.
How do you use a spreader bar with a crane?
Confirm the load weight, check the bar’s marking and inspect it, then rig rated top slings within the maximum included angle and vertical bottom slings to the lifting points. Put the hook over the centre of gravity, make a short trial lift to check the balance, and control the load with a tagline.
Does the weight of the spreader bar count against the crane capacity?
Yes, it does, because OSHA defines the load as the object plus the load-attaching equipment, so add the bar, slings and shackles to the load and compare the total with the rated load at your radius. Use the tare weight marked on the bar.
What angle should the slings above a spreader bar be?
Stay within the bar maker’s stated limit. NSW rigging guidance gives 90 degrees as the maximum included angle between the top slings. A smaller angle lowers the sling tension and the compression in the bar, but it uses more hook height.
Does BOB-LIFT supply spreader bars or lifting beams?
No, we do not: we build truck mounted and marine cranes, and spreader bars, lifting beams, slings and shackles are supplied separately. Send us the load, the device’s weight and your rigging height, and we will check them against the load chart and range diagram of the crane you are considering.
How we compiled this guide
The definitions, the sling angle limit, the markings and the balance check come from three sections of the NSW Government Dogging and Rigging guide: centre of gravity, load shape, and lifting and spreader beams. Purdue University’s overhead crane training notes on spreader bars and lifting beams supplied the remaining device guidance. The rules come from the official eCFR text of the rigging rule in subpart H and the crane rules in subpart CC of 29 CFR part 1926. LOLER regulation 7 comes from the official UK legislation website, and all sources were read in November 2026. The sling forces follow from elementary geometry. The crane figures come from the current BOB-LIFT SQ8ZA4 and SQ8SA4 dimension drawings and load charts, and the boom tip heights are read from their range diagrams and rounded down. The example uses clearly marked assumed weights and dimensions, and Achord Chan, Product Operations Director, carried out the editorial review before publication. It does not replace the device maker’s instructions, the crane’s operator’s manual or the rules where you work.
Need a crane with the hook height for your rigging?
Tell us your heaviest load, the spreader bar or lifting beam you plan to use with its weight and rigged height, the working radius and the height you need to clear. We will recommend a knuckle boom or telescopic truck mounted crane and send its dimension drawing and load chart. If you buy the truck in China, we can fit the crane at our factory, while if you buy it locally, we ship the crane, a local body builder fits it and we support the work remotely. Contact us for a quotation; every crane carries a 12-month warranty on the whole machine.